When you’re focused on your bowing, your fingering, all the little details you have to think about as you perform, other performance details can get lost. Recording yourself as you play is an effective way to listen and observe your performance from the outside.
If your goal is to improve your tone, audio recordings are sufficient. You can record yourself as you practice at home or in other informal settings. If your goal is to enhance your stage presence or get a closer look at what you’re doing physically as you play, then you’ll need a video recording, of course.
Tips for getting the best sound in an audio recording
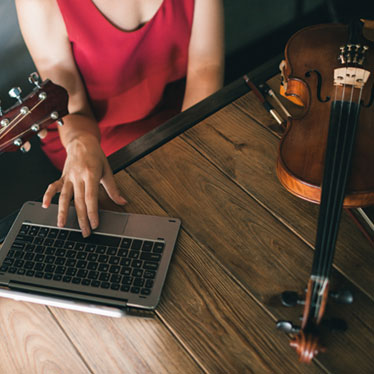
First, be realistic. You’re not recording in a professional recording studio. You can record at home in front of your computer. However, you still want to capture the best sound, so you have a clear understanding of the tones you’re producing and where you may need work.
There are two points in which you can maximize the quality of your recording. First, at the time of recording and second, by editing out background noises after the fact. If you want to record yourself often, invest in a USB microphone that plugs into your computer or phone. Using a high-quality microphone will go a long way to improving your recorded sound quality. Prices range anywhere from $10 to $200.
Also, consider where and when you're doing the recording. Your bedroom may be okay. It's probably better than recording outside. If you have access to a soundproof room, even better. If you aren’t recording in a soundproof room, here are a few tips to improve your acoustics:
- The softer your surroundings, the better. Sound bounces off hard surfaces, which can create an echo. Avoid large, empty rooms. At home, blankets, pillows, and curtains are all effective ways to absorb an echo.
- Minimize the background noise from washing machines, AC, and your kid sister and her friends. Pick your time and location when you can exert the most control over what’s happening in the background.
- Place the microphone near your instrument, but not too near. Test out a few distances to find out what works best for you. Start at five to six feet away and adjust from there.
To edit your recordings, you’ll need editing software (or a “DAW” – digital audio workstation, if you want to know the lingo). Most computers come with audio recording applications that have many useful tools. Microsoft has Sound Editor and Apple has GarageBand. You can also find plenty of apps for your phone that both record and provide editing tools. Two caveats regarding editing:
- Editing software can be complicated to learn. You might find it worth your time if you are often recording. It will undoubtedly come in handy when putting together an audition reel or if you want to expand your expertise in music technology.
- Editing tools can help you improve the tone and quality of what you’ve recorded. That’s not what you want for practicing purposes. You want to hear the sound exactly as you played it. Editing is useful here because you can cut out the background noise, so your performance becomes clearer.
Editing software isn't strictly necessary, but a useful extra. To benefit from reviewing practice recordings immediately, get the best USB microphone you can find in your price range and start recording. If you want to set up a nice at-home recording studio, you can find detailed lists of equipment needed, depending on how sophisticated you want your home studio to be.
Tips for capturing a useful video performance
You can use your computer or phone camera to get an acceptable video with these tips:
- Don't zoom. Place the camera the distance you want it from you, your hands – whatever you want the camera to focus on. Zooming makes things blurry.
- If you want to optimize your sound quality in this recording, don’t plug your USB microphone into the device you’re using to record video. This way, you can place your microphone as close to your violin as you want, while your video recording is at the distance you want to get desired framing.
- Set your recording settings to shoot at 24 frame-per-second. That speed will present you most naturally, as an audience would see you.
- Go for good lighting. Even if this isn’t a recording you’ll share, you don’t want to get distracted by how sickly you look in bad lighting. Natural light is best. You can thank YouTube and Instagram for the availability of portable, affordable video lights. Options run from $20 to $500.
Video recording your practices will do more than help you perfect your technique and stage performance. It is also good experience for when it comes time to put together an audition video.
Looking for every advantage
You spend a lot of time practicing. Get the most out of your efforts by recording many of your sessions. You can review them and ask your teacher to review them as well. If you record yourself playing the same piece over time, you should hopefully see some quantifiable improvement. There’s no reason not to use this ubiquitous technology to improve your playing.

Share this article
