Get better sound from your violin
The violin is a splendid, artistic instrument. Ready and able to produce rich, pleasing melodies that have the power to move you into another world.
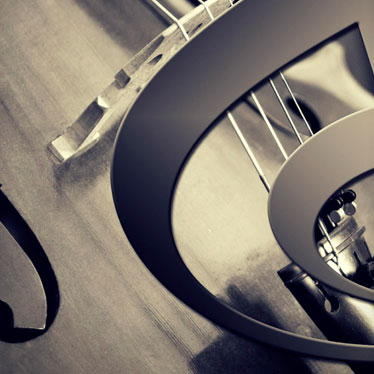
The violin's harmonious tones can’t happen if your bow isn’t functioning at its optimum best.
Know how to adjust a violin bow so that you’re playing your best. For students this basic function is an essential part of becoming a skilled player. If your bow isn’t adjusted properly every time you play, producing sounds with it will be nearly impossible.
Bow Basics
Your violin bow is constructed of organic materials, wood and horsehair, primarily. And as such, it is susceptible to all sorts of things that can damage its functionality.
Extreme heat and cold, high humidity and other environmental factors affect how your instrument, and your bow will behave. Just like the violin, your bow is delicate and fragile, never leave it exposed to the elements; keep it in your case.
You should not use your bow to tap on the music stand, leave it on a chair, or drop it as it will break.
Each time you play, there are steps involved to adjust a violin bow. These are crucial for maintaining your bow’s performance quality (responsiveness) and it will make playing music easier and more enjoyable.
- First, tighten the bow by gently turning the tension screw. A good rule for the correct tightness is to adjust a violin bow so that the hairs are no further than a pea-size away from the stick. (Often, a pencil placed on its end is used to gauge the amount of space.)
- Don’t over-tighten. The bow stick is constructed with a slight curvature—over-tightening it will not only damage or even break it medium term, but will also suppress some of the mechanical benefits of the bow construction which are critical to ease several bow strokes.
- If when first using the bow on the string, no sound is produced, this means no rosin has been applied. Rosin is made of tree sap. This sticky component once applied on the hair allows the bow to activate the string and make it sound. If the rosin is brand new and shiny, first scratch it a bit with a pen to facilitate the first applications. Holding the rosin in one hand, the bow in the other, place the hairs flat on the rosin block, and run the length of the hairs across it. After 5-10 complete strokes should be adequate with new hair. Then play a long slow bow to verify the quantity applied : if by playing you see residue falling on the instrument or a cloud of rosin dust being produced, there is too much rosin. Just wipe a clean dry cloth once over the hair. If instead while playing you hear some places on the bow that don’t speak, some that sound scratchy, play a few more long bows to help spreading the rosin over the whole length of the bow. The more you play, the more you will get used to how much rosin, and as a result how much “bow noise” you like best.
- Always loosen the bow hairs after playing, so that they are touching the stick before storing it safely away in your case.
Cleaning/Re-Hairing
- wash your hands before playing as it will keep it clean
- natural hair weaken or break with time faster than synthetic one. Less hairs on the bow impact not only the sound, which becomes less rich and subtle, but may also damage wooden bow by pulling on the tip more from one side than the other. So it is safe to have your bow re-haired once a year, more if you are an advanced player
- Try not to touch the hairs with your fingers : the rosin will grab the natural oils in your skin and as a result loose string traction properties. Besides, you fingers will become sticky!
- Don’t clean your bow yourself : have a professional do it … or aim for have your bow re-haired.
- Always wipe down your violin’s strings and body after playing with a clean cloth to remove the rosin dust that has accumulated. Make sure you clean that cloth regularly … or you will only spread again the rosin dust you have removed the previous days!! Learn maintenance tips for your violin strings.
Troubleshooting
- Bow won’t tighten—possibly the humidity has caused the hairs to stretch, or perhaps continued over-tightening has actually stripped the eyelet inside the frog. Another solution is to go for a good brand of synthetic hair which will barely react to humidity changes so will always tighten to the right level and last longer.
- Bow won’t loosen—it’s probably due to extreme dryness. Often in cold weather or very arid conditions the bowhairs can contract to the point that they eliminate the camber. If left that way, your bow can eventually snap right at the tip. If so, remove the frog from the bow to avoid more pull at the tip and bring it to a luthier for a re-hair. There too, go for a good brand of synthetic hair.
- Rosin won’t help—you need to have the bow re-haired. A good rule of thumb is approximately every 6-9 months, depending on how often you play.
- Bowhairs keep breaking—this is either due to the original quality of the hair or to how long it has been in place. Top quality white stallion hair is more and more difficult to get. As a result, prices savings in the quality leads to earlier breakage of the hair. The easiest and cheapest solution is to opt for good quality brand of synthetic hair, which last longer, doesn’t react to humidity changes and offer as strong a sound at the tip as at the frog. If the breakage is happening long after the bow was re-haired, it is a sign that you are due for a new re-hair
Remember the violin is a splendid, artistic instrument and it can produce beautiful sounds when adjusted properly.

Share this article
