3 Intermediate Tips For Writing Your Own Music With GarageBand
The GarageBand music app makes it super easy to build and record your own projects. However, the app itself takes some time to learn. The basic tools are fairly straightforward, but there are a wealth of options that allow you to make professional sounding music. So, if you are a budding composer and want to try your hand at something a little more advanced, the following tips can help you modify your creations on the GarageBand app.
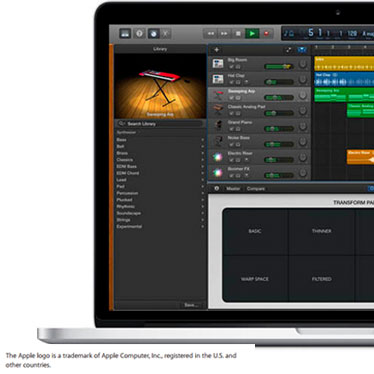
The basic recording features on the app are excellent. The three tips below relate to the mixing process and help you recognize the numerous options available for making your pieces sound professional.
#1. Understanding Filters
Equalizers are made up of filters, and a filter is essentially a tool that allows you to choose which frequency measurements you want to include in the music. Once you grasp filters, the other features will make much more sense.
The Parametric equalizer lets you choose a specific frequency to control. It has two measurements that allow you to cut or boost the specific and surrounding frequencies that you want to alter. This tool is invaluable for cutting out yucky overtones or line buzzes. The Bandpass filter is similar. It allows you to set the frequency you want to pass through, and how broad it should be. Basically, this means you can make special effects.
Shelf filters allow you to impact the high and low end of the audio spectrum. You can bring out the sharpness of an instrument or voice, or darken a sound that is too bright. The Pass filters let you regulate which frequencies come through according to the frequency you set. It lets you cut out sounds like the rumble of a bass or reduce brightness.
The Filter tool includes all these options on one view. It is particularly important in live recordings because you can reduce inaudible sounds that impact the audible ones, making it a key feature to master.
#2. Compressors – What are they and How to Use Them
Compressors are a vital tool in recording studios. Essentially, they control the dynamics of specific sounds, raising some and lowering others so that the sounds are even. When you open the compressor tool, you’ll see a gauge with threshold, ratio, attack, and gain listed. The threshold allows you to choose where you want the compression to occur. You can choose very loud sounds or low ones. The ratio gives you the ability to dictate the amount (how much) of volume reduction you want. Attack determines how quickly the compression kicks in and is usually set by the type of music you’re making. Jazz would have a lower attack level, but hip hop or rap music, much higher.
Gain (or output) is sort of ironic. It means that once you’ve chosen the threshold, the other sounds will increase to meet that point. Don’t get too excited about compression, ask yourself what type of qualities you need to control. For example, bass drums are almost always compressed, but you wouldn’t want to compress cymbals which need to provide emphasis at specific points. Also, consider the genre and where the music will ultimately be played before you compress. Experiment with the tool and you’ll see what effects work best for a specific piece.
#3. Modulation Effects
This feature of GarageBand allows you to control a variety of influences such as pitch shifts, volume, timing, and phases. The app includes fundamental options like tremolo, chorus, flanger, and phaser. Each one provides specific effects for your original music, because you can take a sound loop, change the variables on it and then mix it back into the original sound. But don’t worry, it’s easier to do than explain. The following information is just a quick overview of each, in order to understand the basic premise.
- The Chorus Effect—Time and pitch effect sound. The chorus tool emulates sounds from multiple instruments. It splits a sound signal, changes the pitch effect, and allows you to impose loops over each other.
- Flangers—Just like the chorus tool, flangers split the sound and change its pitch too. It bends and delays the pitch.
- Tremolo—Is the simplest modulation. It raises and lowers the amplitude, but the controls allow you to change where the sound is emitted and the tempo of the sound.
- Phaser—This effect allows you to adjust the intensity, speed, and feedback levels of a sound loop.
All of these tool are found on the "Edit" tab, and the best ways to learn to use them involves practice. Grab a recording that you can experiment with and just explore the different options available. The GarageBand app can produce professional recordings, you just need to learn how.
Share this article
