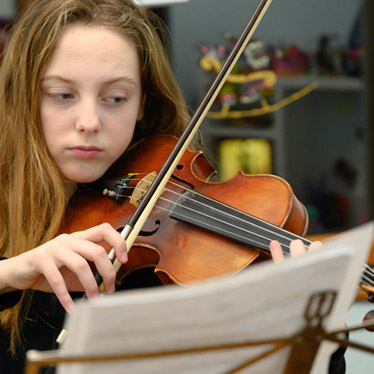
In the beginning, you learned the basics of violin bowing – a proper bow hold, keeping your elbow at a right angle with a relaxed wrist, and using a mirror to check your form. Now that you’ve arrived at the intermediate-advanced level, it’s time to step up your game.
The following are nuanced, higher-level bowing techniques for the more serious violinist.
Understand the three forces involved in the relationship between violin and bowing
In a recent master class, Mimi Zweig demonstrated three critical forces involved in the relationship between the violin and the bow: the upward position of the violin, the downward weight of the arm (letting gravity do the work for you), and the use of the neck (rather than scrunched shoulders) to support the violin against the body. Click Here to view a portion of her master class session.
Leveraging these three forces creates resonant-perfect sound, automatically improving violin tone. Mimi Zweig is a professor of violin at the Indiana University Jacobs School of Music, You can access portions of her master classes and tutorials for free at StringPedagogy, sponsored by Thomastik-Infeld and Connolly Music.
Sul ponticello vs. Sul tasto
When you first started playing the violin, your instructor diligently reoriented your bow position, keeping it equidistant between the bridge and the fingerboard. Now you’ve mastered that technique, freeing you up to play with bowing position to elicit specific qualities of sound.
Sul ponticello
If you move the bow down so that it is right above the bridge, or practically on the bridge, you are playing “sul ponticello.” The strings vibrate differently, emphasizing the higher harmonics, creating an eerie or haunting sound. Changing the pressure of the bow on the strings yields further, intentional control of which harmonics are emphasized.
Sul tasto
Positioning the bow on the opposite side of the mid-line, toward the fingerboard, is called “sul tasto.” Now, your violin has a softer and more ethereal sound. This technique is used to play more delicate sections of a piece (such as the Adagio ma non troppo, in Anthonín Dvořák’s, Violin Concerto in A minor, op. 53). And, countering the effect of sul ponticello, playing sul tasto emphasizes lower harmonics.
Once again, here’s Mimi Zweig explaining the short story of harmonics.
Playing Col legno
Another surprising bow technique is “col legno.” A direct translation of this Italian term means, “with wood,” and is played as such. You turn your bow upside down and play using the wood – or carbon fiber composite – side of the bow.
Sometimes the col legno technique requires long bowing, just as if you were playing normally. When that’s the case, your score will be marked (or the conductor will have you write in), “tratto.” Sometimes, however, this technique is used more like percussion – with quick raps on the strings. That version of col legno is called “battuto.”
You can listen to - or play - an example in Hector Berlioz’s Symphonie Fantastique. In this version of the composition, you’ll hear the violins play “col legno battuto” around minute 9:17.
Richochet
Another percussive bowing technique is the “ricochet,” which is sometimes marked or called out as “jete.” For this technique, you intentionally bounce the bow as it’s moving in a single direction. In addition to being fun, you’ll also see how different parts of the bow move faster or slower as the result of physics. The upper half of the bow bounces more quickly, while the middle of the bow creates slower staccato notes.
We like this ricochet tutorial by Todd Ehle, from virtualsheetmusic.com. His key tip: the bow hair must be in a completely flat position (no rolling onto the outer side of the hairs) to work.
These higher-level bowing techniques will take your violin playing to the next level, deepening your musical expression in a more customized way.
Sponsored by Thomastik-Infeld

Share this article
