Most non-professional violinists replace their strings every 300 playing hours or so. That works out to about every three to six months. More serious students and professionals change strings more frequently. Since this routine maintenance task takes place so often, it makes sense for musicians to learn how to do it themselves.
The good news is that replacing or changing violin strings is a DIY violin repair that any player can master.
Learn from a pro
We recommend taking your violin to your violin instructor or your luthier, the first time or two. While replacing violin strings isn’t a complicated task, it’s important that you learn to do it correctly.
Most music stores will change violin strings for $20 or less, so it’s an affordable repair. Call ahead and book an appointment, letting them know you’d like to observe the process so you can learn to do it yourself. The second or third time around, change the strings on your own under their supervision. After that, you’ll be ready for DIY violin string replacement.
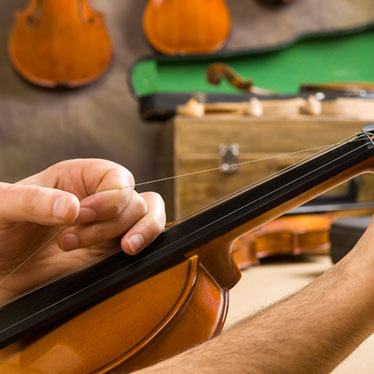
4 Steps for changing a single violin string
The following steps are taken from, The Musician’s Ultimate Guide to Violin Strings. We recommend bookmarking the guide and keeping it handy as it answers virtually every question you’d have about violin string types, gauges, sounds, maintenance, and so on.
Please Note: Violin strings should be changed one at a time to maintain tension on the bridge and the sound post. Removing all four of the strings at once can cause the bridge and the sound post to collapse.
- Step 1: After removing the peg from its hole, apply a small amount of peg compound to areas of the shaft that come into contact with the peg box. Turn several times until you feel the peg moving smoothly. If you encounter resistance, you might need more compound.
- Step 2: Thread the string through the hole and only let an inch or less of the string come through the other side.
- Step 3: Slowly turn the peg away from you and guide the string towards the inside of the peg box using the index finger of the hand that’s not turning the peg.
- Step 4: While keeping your index finger against the string, turn the peg until the string is fully wound onto the peg. Be sure not to apply pressure here. If successful, you’ll notice a gradual tightening feeling as the excess string winds onto the peg.
Are you changing the entire set?
While you don’t have to change your violin strings in any particular order, most violinists opt to remove/replace them to streamline the process.
- Slightly lower the pitch of all the strings in order – A, E, D, G.
- Start by removing the G string, replacing it as per the instructions above, and then bring it just under pitch again.
- Do the same for the E, D and G strings.
Once all of the strings have been replaced, bring them all back up to pitch.
Breaking in new Strings
You’ll notice your new strings don’t feel – or sound – quite like they used to. Quite frankly, the strings will sound horrible at first. This is because they need to be “broken in.” Also, if you fail to break them in properly, the strings will need to be re-tuned too frequently for comfort. FYI: musicians of all string instruments – both fretted and non-fretted – have to break in new replacement strings before resuming play time.
Click Here to watch a video from Chris, of Thomastik-Infeld, as he demonstrates how to break in new strings so they’re concert-ready.
This is a helpful technique to learn because you’re bound at some point to encounter a broken or snapped string during the middle of a concert or performance. The more prepared you are to replace, and break in your new string, the sooner you’ll be able to play again. The breaking in process takes about three minutes per string, so around 10 minutes or so to break in a brand new set.
Routine maintenance preserves strings
It’s true that all violin strings need to be replaced every 300 playing hours or so, but it’s also true that good string maintenance is key for reaching the 300-hour mark. Make sure you wipe down your strings and your instrument after each practice/playing session. This removes excess resin, sweat, moisture, and dust that deteriorates the strings.
Also, wash and dry your hands before practicing or playing since sweat, dirt, chemicals, and oils from your hands and fingertips can corrode the components of the string.
By taking care of your violin and its strings, and replacing the strings as needed, you and your violin will enjoy optimal sound quality.
Sponsored by Thomastik-Infeld

Share this article
