
Rosining your bow for the first time is a milestone of sorts for new string musicians. Prior to practicing and developing muscle memory, holding the bow and fingering the strings feels clumsy, but rosining the bow is something you can do with confidence.
However, like everything else associated with playing a violin, viola, cello or bass – rosining the bow requires some know-how and finesse. The type of rosin, the amount you apply (or not) and the frequency with which you apply it, all affect bowing and sound.
Over time, you’ll develop a feel for exactly how much to apply based on personal preference or a desired sound quality. Until you get to that more practiced and intuitive place, here are tips on how to rosin your bow.
1. Choose the right type of rosin for your instrument and climate
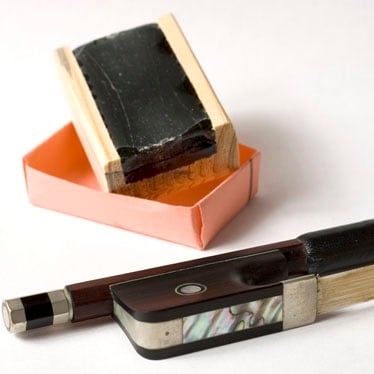
Bow hairs are smooth and slippery. Rosin adds texture and resistance. Made from the sticky resins of coniferous trees, rosin comes in a range of colors and densities. Darker rosins tend to be heavier and stickier, better for the larger string instruments. Rosins that are lighter in color tend to be lighter in density and stickiness, more suited to violins and violas.
Climate also plays a factor. Just like your instrument, rosin responds to changes in temperature and humidity. If you live in a hotter, humid climate, you may prefer to use different rosins for different seasons.
On that note, always keep rosin stored in the instrument case with a humidity-regulating accessory of choice to maintain its integrity.
2. Ask if your new bow is pre-rosined
When you purchase your instrument and bow, ask the store if your bow is pre-rosined. New bow hairs require more effort to rosin properly since the hairs are rosin-free. If it is pre-rosined, you’ll be able to practice and play a couple of times before your bow requires rosining again.
By the time the bow needs rosining, you’ll have the following instructions available to you and your music instructor will model proper rosining for you. Even so, you’ll only need to pass a pre-rosined bow through the rosin three or four times at most.
If your bow has not been pre-rosined, you’ll get to do it yourself. A brand new, unrosined bow needs to be passed up and down, from bottom to top, across the surface of the rosin about 40- or, even 50-times, to develop the slightly abrasive surface you’re looking (listening) for.
3. Score the surface of new rosin cakes
New cakes of rosin look shiny and smooth, but this also means it takes longer for the abrasive rosin to rub off onto your bow. For this reason, we recommend using a plastic fork or a serrated plastic knife.
Gently scratch the surface (“gently” is the key word here – you don’t need to press hard at all), working back and forth until the surface is dulled or scored. You shouldn’t gouge or poke the rosin. Once the glossy surface is dulled, the rosin is ready to adhere to your bow.
4. Not too little, not too much
Note: It’s important that you never touch your bow hairs. The oils from your finger rub off onto the hairs, making it harder for rosin to stick.
Now it’s time to rosin your bow:
- Tighten your bow. Rosining the bow with loose bow hairs can damage them.
- Start with your rosin cake at the base of the bow. Slowly and gently, pass the bow across the cake’s surface from the bottom of the bow hairs to the top. This should be done relatively and consistently so rosin is applied evenly. If you move too quickly, the friction generates heat and can solidify the rosin cake.
- Rotate the rosin cake so the surface wears equally over time. Otherwise, rosin grooves or tracks will appear, making it difficult to apply rosin equally across the length and breadth of the bow.
- As you play, you’ll notice fresh rosin dust sifting down onto the strings and the body of your instrument. Use a soft cloth to wipe excess rosin dust off your instrument when you’re done playing. This helps to preserve both the strings and the instrument body.
Typically, students should re-apply rosin every four to six playing hours, which equals about two times per week.
5. How much rosin is enough?
Experiment with how much or how little to apply over time to learn how different amounts affect the feel and sound of your playing.
No rosin
You’ll notice that no rosin, or hardly any rosin, creates a very hollow and pale sound – and that you’ll have to press much harder to make any sound at all.
Not enough rosin
Applying more rosin – but not quite enough – will elicit more sound, but it will be inconsistent because the bow will have trouble moving smoothly, but with enough friction, across the strings.
Just right rosin
When you have just enough (usually four to five strokes of rosin) the bow moves easily and consistently across the strings, creating warm, rich tones.
Too much rosin
You’ll know you have too much rosin because in addition to the cloud of rosin emanating from the bow as it moves across the strings, the bow will feel “stickier,” requiring more effort to move it, and sounds may be scratchy and harsh.
Before you know it, applying rosin will be an effortless part of your practice. Until then, keep these tips handy to develop good rosining technique.
Share this article
